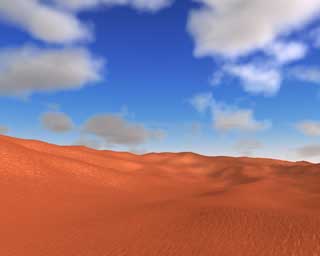
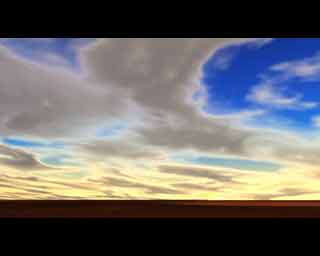
| Now here comes the tutorial on
how to make this clouds. It will be short because my time
right now is short. I don't know how many pictures I will
use, may be you have to live with plain text and see how
simple it is But now
to the X-files:
It's a kind of 2.5D. The oldest CGI effect. Only bread
and butter or better only planes and SLA :)
I used planes or polygons or floor
objects. The behavior is the same, but planes/polys might
have an advantage because they are more fexible. With a
limited size and a fade out at the end they could be used
for special/limited places. Also a camera rotation could
be easier.
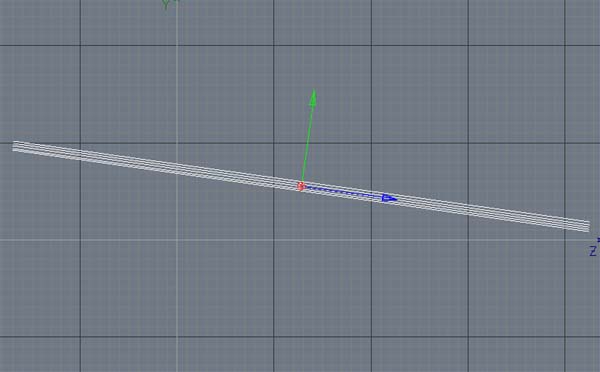
Picture one. Planes
Why I used planes:
There is only one trick when using
planes or floorobjects. Usually they are horizontal. But
that gives you real nasty looking objects in the distance
- the single planes could be seen or better the single
cloud levels will be visible. So you have to use some
degrees (6 to 12) to tilt the planes and you get rid of
that.
That is also the reason why you can't use spheres. If you
want to get a closed sky better use triangles arranged in
a circle, as shown in the picture below.
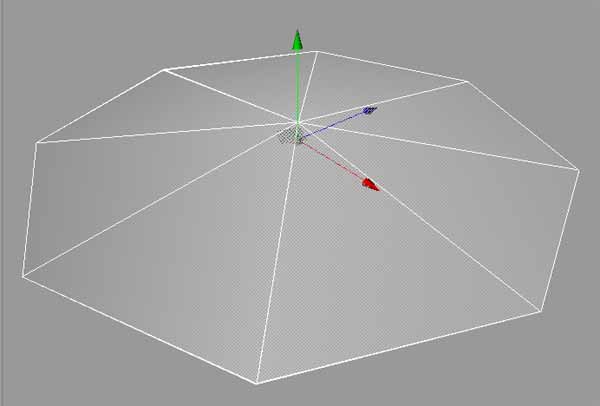
Picture two, Planes
arranged for 360°.
Now do the following. Create a
plane at 500m hight (y=500). Size of the polygon should
be 6000x6000 you don't need subdivisions. Make an
instance from the polygon and place it 5m above the
original. Copy another one 5m above and so on (or use the
doublicate command with instances turned on). Do this
till you have 8 till 12 polygons - you can create more
planes (<50) be aware to change the ray depth
within general settings! and be aware of more planes longer
rendering times. The Sand.avi used 30 planes over 300m.
Group the objects. If you think you might try larger
distances between the planes use the scale command with y
axis. Rotate the grouped object P=-8 degrees. Rotate
about H depends on your standpoint. You should look into
the tilt. Place the camera close to the floor <10m.
Attention: The
cloud size depends on the distance between your camera
and the used planes. If your clouds are too small you can
change the "Global Scale" within the material
but as you all know you can also change the size with the
material tag. The later could be the better ;)
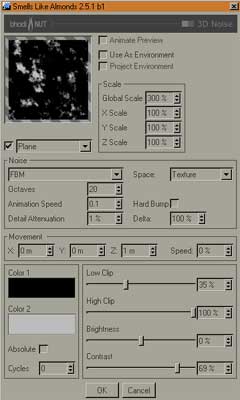
Material:
Use an SLA
3D-NOISE shader at the Alpha
channel. Every turbulence works fine. FBM looks
very nice but a little to soft (marocco and sand
avi's ). There are a lot of noises that work
pretty good. I've done such a lot of tests that
I'm not quite sure which shaders could be used
(may be naki, luka, nutous but as said, not quite
sure).
The alpha chanel is most relevant. Not so
relevant is bump also it can give nice effects,
specular and color, as well as diffusion. To
control you clouds you can play with the size of
the material at the object manager. Start with
5000-3500-5000 make it smaller or larger (till
24000m or even more). You should
play with the min. max. and contrast values of
the 3D-Noise shader ! to get more darker areas
(and less clouds).You
might try a SLA-gradient with the color? Try it
out.
For the 'Dark-Cloud'
material Try THIS.
|
Picture two:
Material |
THE MIGHTY POINT:
Luminence: This one was used in all animations. I guess
it's essential. You can use the 'normal' luminance but
all result have been created with BANJ at the luminace chanel. By chaning the BANJ values you can achive incredible effects.
And of course this depends too on the number of planes
you use.
Attention: To get a better idea on who
BANJ works go
here. Be aware that this
page contains a LOT OF DATA. You should have a fast
internet conection or you have to wait.
Animation:
Now you want to animate your clouds. There are two things
you have to be aware of. First the movement of the
clouds, second the clouds changing.
To move your clouds you don't have to move the planes or
whatever you might use. Simply move the texture. How is
that done. Make a texture sequence for you material. The
first key at frame 0 is left unchanged. Place a second
key lets say at frame 500. For the Z value use 3000 or
-3000. Notice, this value depends on your material
settings like projection and size. Have a look at the timeline.
The second parameter is set at the Banj dialog. As you
can see it above, there is an 'Animation Speed' of 0.1.
Be carefully with this value. Clouds change slowly. You
might use values between 0.1 and 0.3 in the beginning.
Lower values makes the clouds change slowly. This
parameter behaves different with other 3D-Noises. But as
far as I encountered it's always below 1.
The lightning is a mighty point
too. But till now I didn't use more than 2 lights. Mostly
only one light. The whole scene is pretty resistant
against camera standpoint and this kind of things.
If you have questions, let me know.
I said that it's simple, didn't I?
Oh, for the rest you might use the
SkyShader or you have to do it by yourself. Create a
sphere and use a gradient (SDK gradient - SLA gradient)
for the material. To use haze, create another sphere a
little bit smaller. Remember that you can scale a sphere
with the scale on the coordinate manager. But this is
something for another page :)
If you get really good
results, please let me know. If you encounter some new, I
would be pleased to participate.
Regards UK
<- Back to Landscape
|