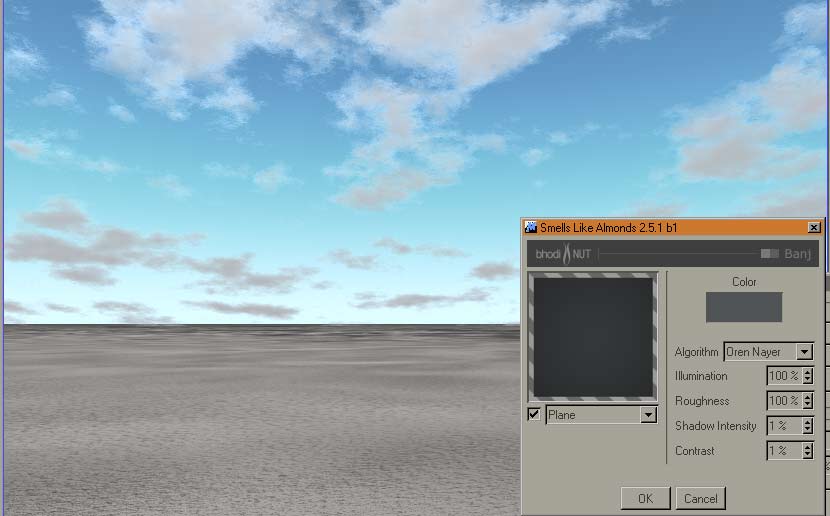
| Contrast |
|
| Are you sure you
realy looked into Banj? Probably not. So let's
encounter some things about it. You need smooth clouds?
Try the following: Set the contrast very high !
You think because of setting the 3D Noise very
high and the picture gets rough it has to be the
same here? WRONG. The opposite is the case. It's
getting smoother ! :)
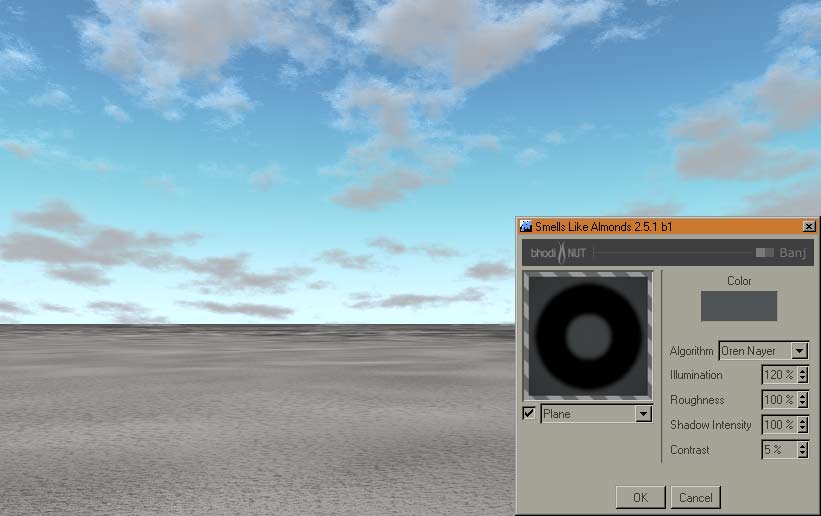
The picture on the right shows the Contrast
parameter, which is pretty high, but produces the
soft clouds.
|

Contrast =
100 |
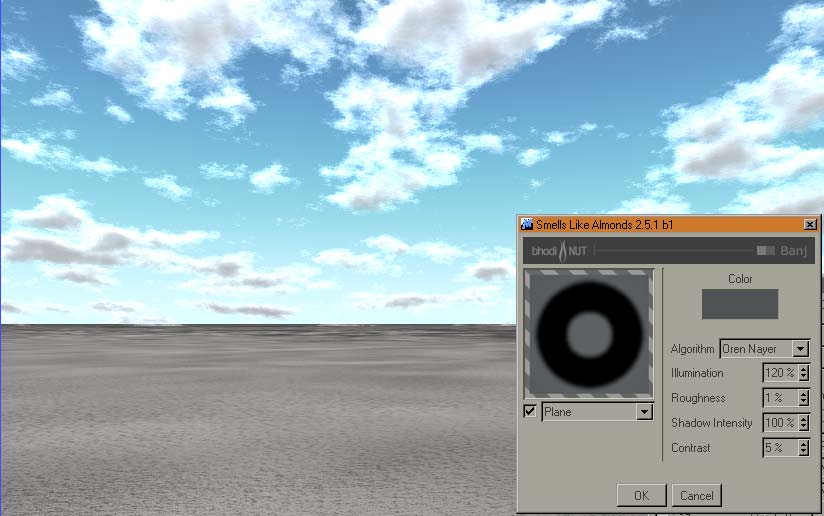
| With contrast at
50% you'll see, that there is not that much
difference to 100%. But look at the next picture. |

Contrast = 50 |
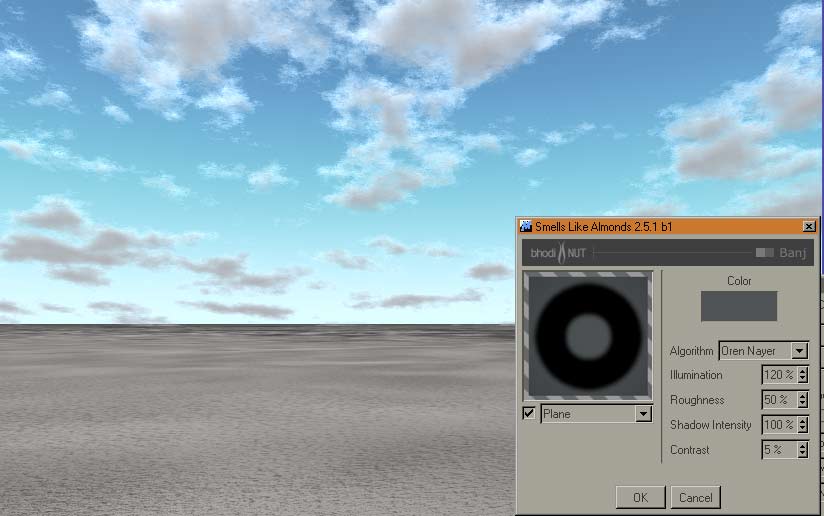
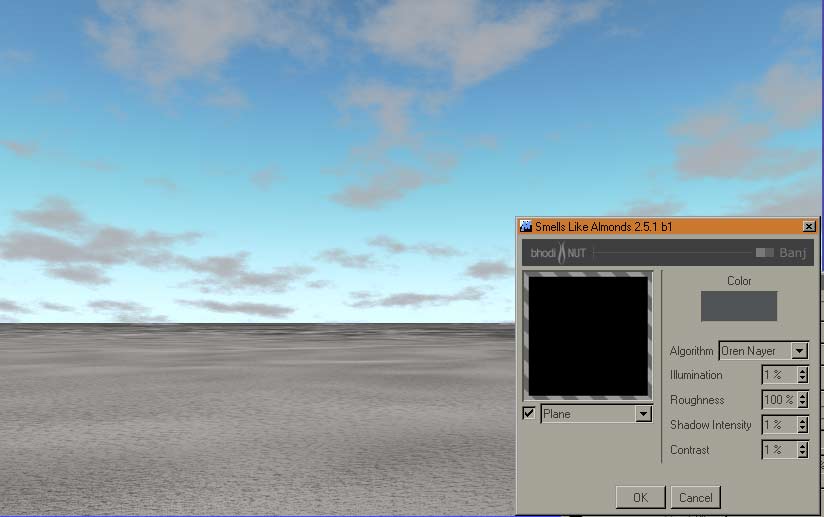
Here you can see
the low contrast parameter. You also may notice
that the clouds get pretty sharp. It's almost a
relief effect and at the edge of the clouds it
almost looks like a painting :)
Also notice that the shadow intensity is pretty
much low.Click
on the picture to get a higher resolution.
|
Contrast = 1 |
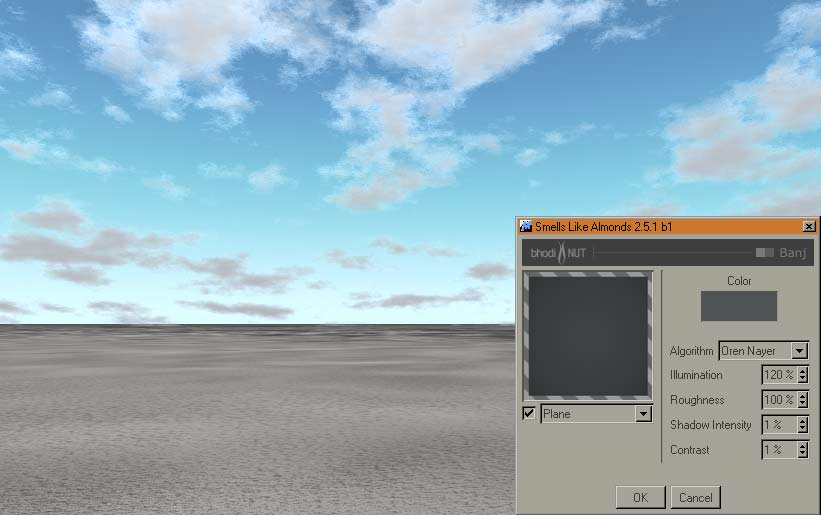
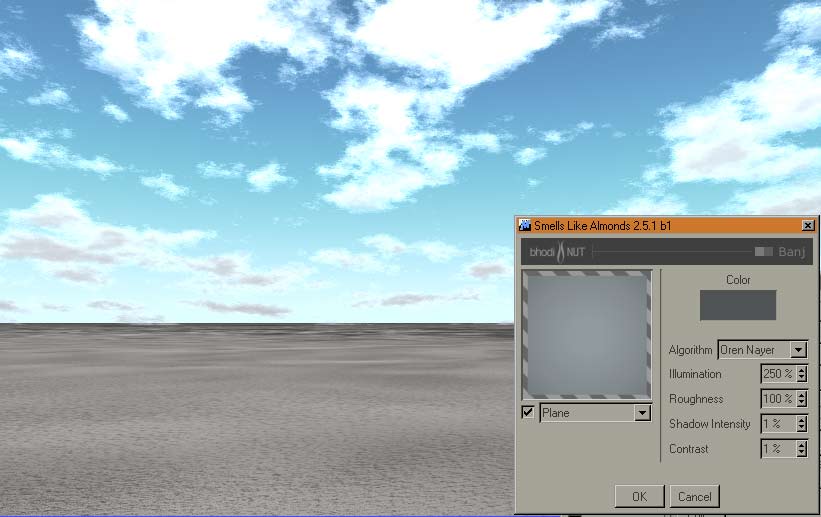
Contrast at 101%. As you
might see, there is a significant change in the
look from 100% contrast to 101% contrast. Don't
ask me why, ask David :)
It stays the same with the contrast parameters up
to 500% as you can see below.
Notice that if you reduce now the luminace
channel brightness you will see more of the
clouds structure, but all still bright. |

Contrast = 101 |
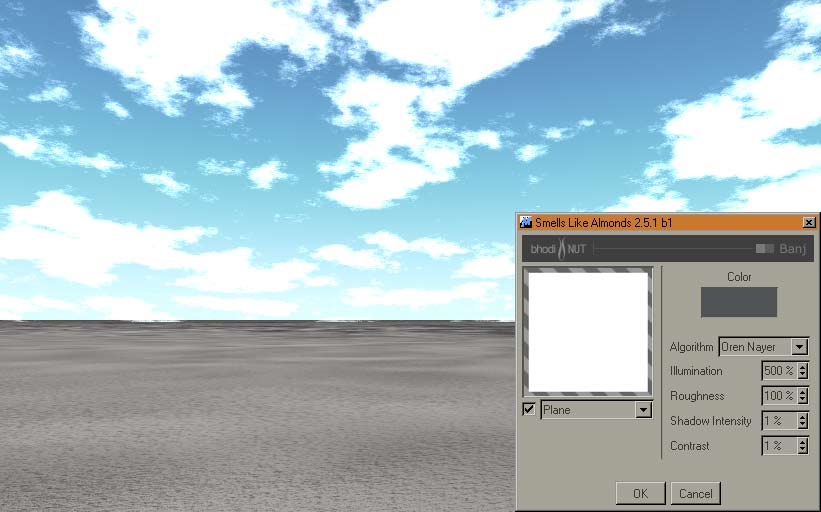
| This picture
shows Contrast at 500%. That's pretty much high
and might give you some idea to experiment with
other parameters. |
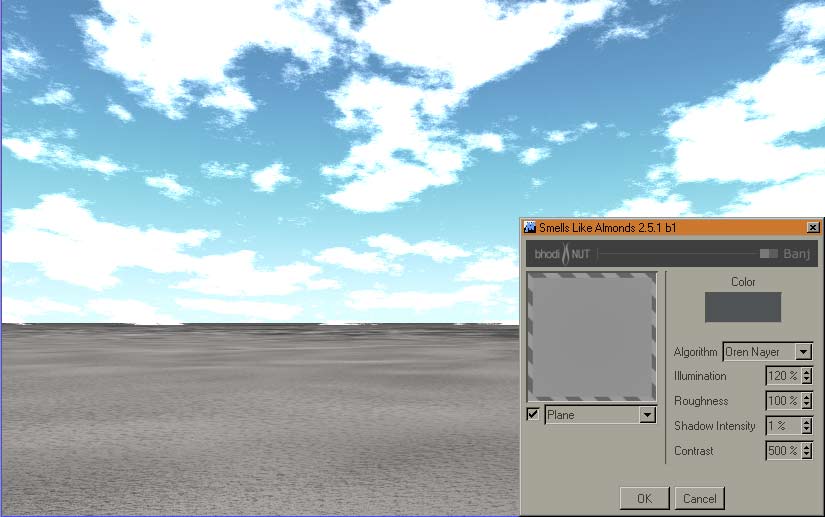
Contrast = 500 |
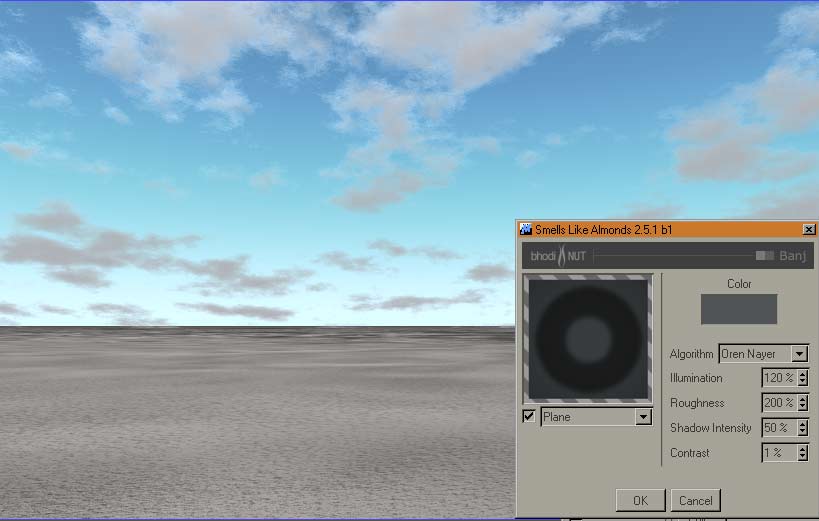
| Shadow |
|
| Same picture as
with contrast = 1. Only placed for a better
comparison on shadow parameters. |
Shadow = 1 |
| This is with 50%
shadow. As you can see the difference isn't that
much. Also with 100% the clouds became only a
little bit darker. |
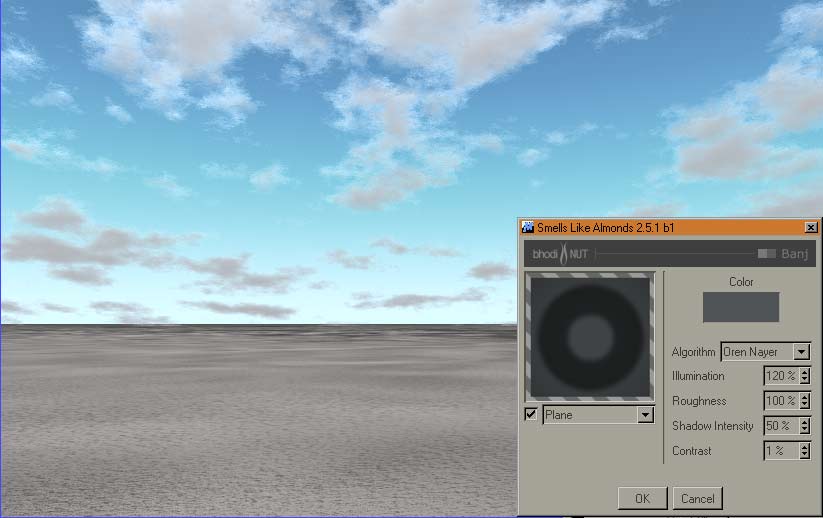
Shadow = 50 |
| With this
picture you can see that the shadow is getting
slightly darker. Not that much as you might
expect because of the difference from 1 to 100,
but it also depends on the other luminace
settings. |
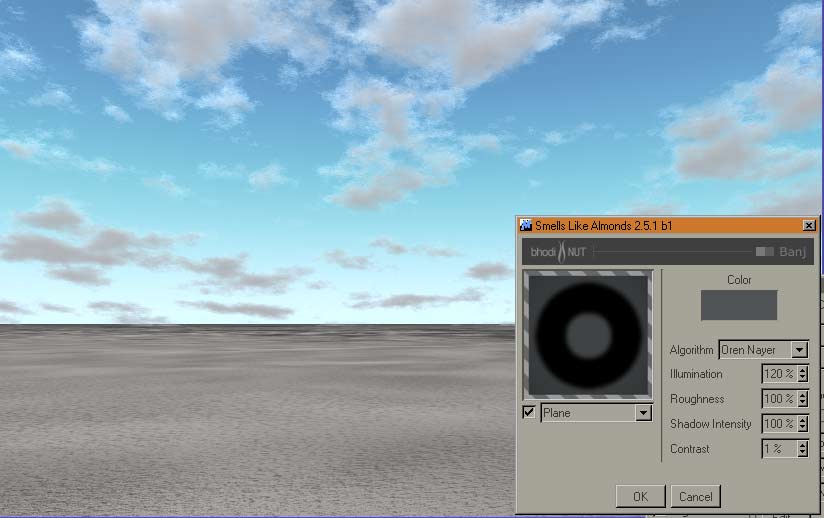
Shadow = 100 |
| If you now
choose to have a little smoother clouds let's say
5% contrast, the clouds get a little bit darker. |
Shadow = 100
Contrast = 5 |
| Roughness |
|
| Now we come to
roughness. All pictures above have been done with
100% roughness. What do you expect to get with 1%
roughness? Well you can see it on the right. It's
getting sharper and has a lot more contrast :) |
Roughness = 1 |
In this picture
a roughness of 50% is used. So
"contrast" is reduced.
As far as you could see right now, there is a lot
of potential in it. But be
carefull not to mix up all this stuff, because
some parameters act only at specific values. If
you use 50% on all you might get more or less the
same as with picture 1. |
Roughness = 50 |
| You've already
seen this picture, but I used it here so you have
a better comparison. |
Roughness = 100 |
| And now to make
it complet Roughness at 200% |
Roughness = 200 |
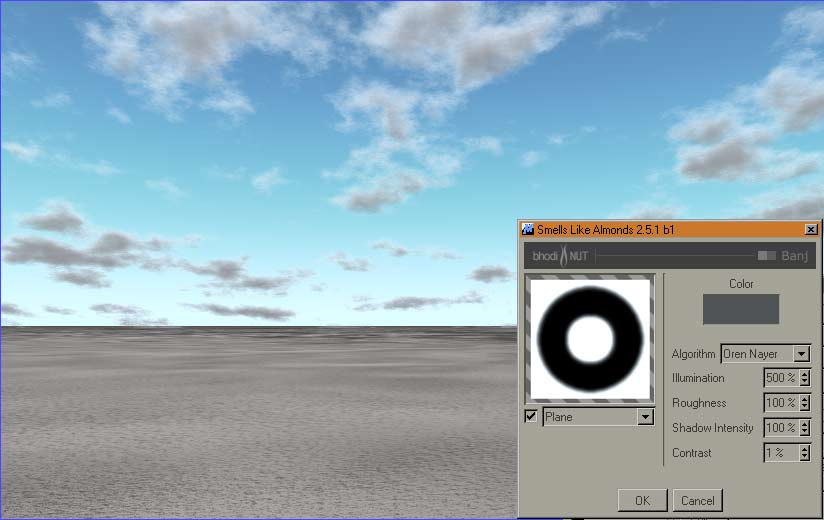
| Illumination Oren
Nayar |
|
But wait, there
are some parameters left, right?
What about the Illumination? Well, this might
react as you would axpect. A lower vlaues gives a
darker flatter cloud, almost like picture 1. |
Illumination = 100 Oren Nayar |
| That will be
Illumination with Oren Nayar at 50%. |

Illumination = 50 Oren Nayar |
| And this is Illumination
with 1%. So you might notice that it's getting
more flat. |
Illumination = 1 Oren Nayar |
| As you might know
Illumination can be set 1000%. Now we try 250%
with Oren Nayar and it's a lot brighter. |
Illumination = 250 Oren Nayar |
| With 500% it's getting
even brighter. And I didn't place a pitcure with
1000% because there is almsot no difference, it's
even more brighter. But notice that this all
depends on your other settings. Also the
birghtness of the luminance channel. If you
decrease the brightness it might give an
aceptable result. |
Illumination = 500 Oren Nayar |
For that reason I place
this picture. Was it too bright with the
illumination at 500%. For the Luminacechanel I
used 64% for Banj and 19% for 'normal'
brightness. Also the Mix was set to normal the
19% brightness influences Banji!
For this picture the brightness was reduced to 0%
and Banji was reduced to 20%. Now shadow
intensity has more influence. With 1% you get an
almost white clouded picture, but with 100%....
see youself.
It's getting pretty hard right now and becasue I
used only 7 floorobjects with a large distance
between them you can see the planes.
|
Illumination = 500 Oren Nayar |
| Illumination
Internal |
|
But now instead
of Oren Nayar the internal algorithm.
To compare it with Oren Nayar |
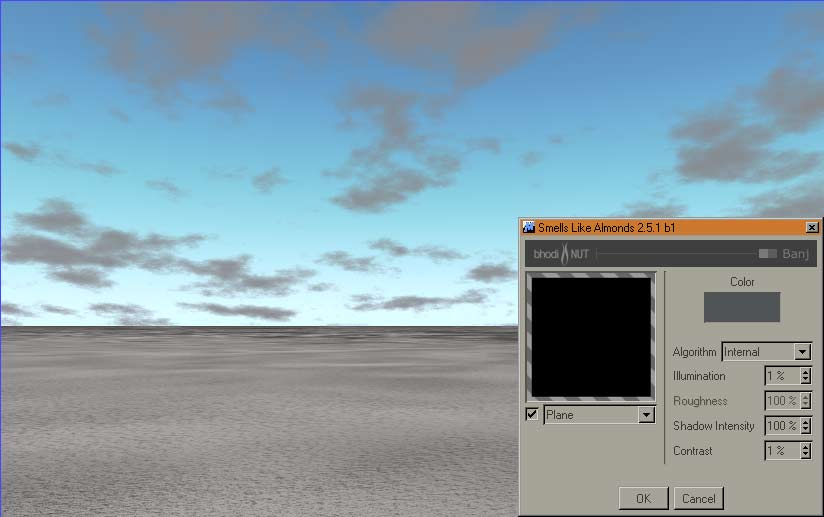
Illumination = 1 Internal |
| And now 50% internal. |
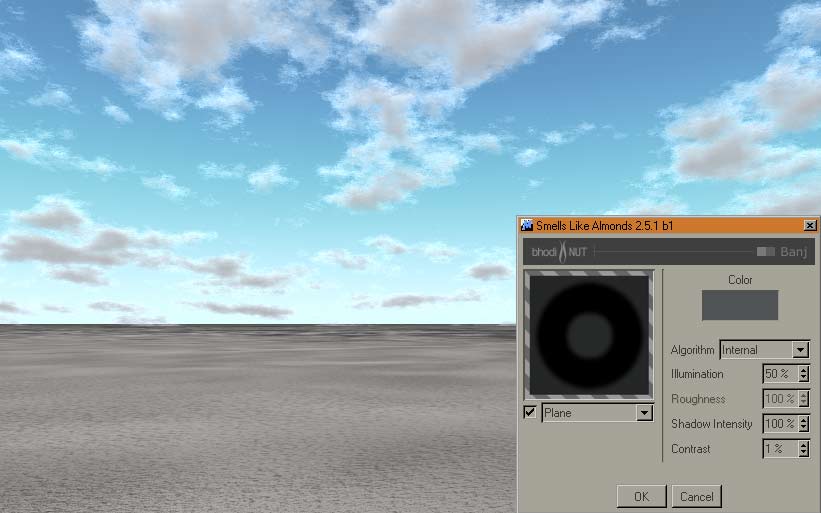
Illumination = 50 Internal |
| This is with 100%
internal. It's also getting pretty sharp. |
 |
| And to compare
it better with the other pictures and to show
again the difference of the shadow this has 50%
shadow with 100% illumination |
 |